There are few smells in life that can stop people mid-walk.
Fresh coffee does it.
Warm cookies do it.
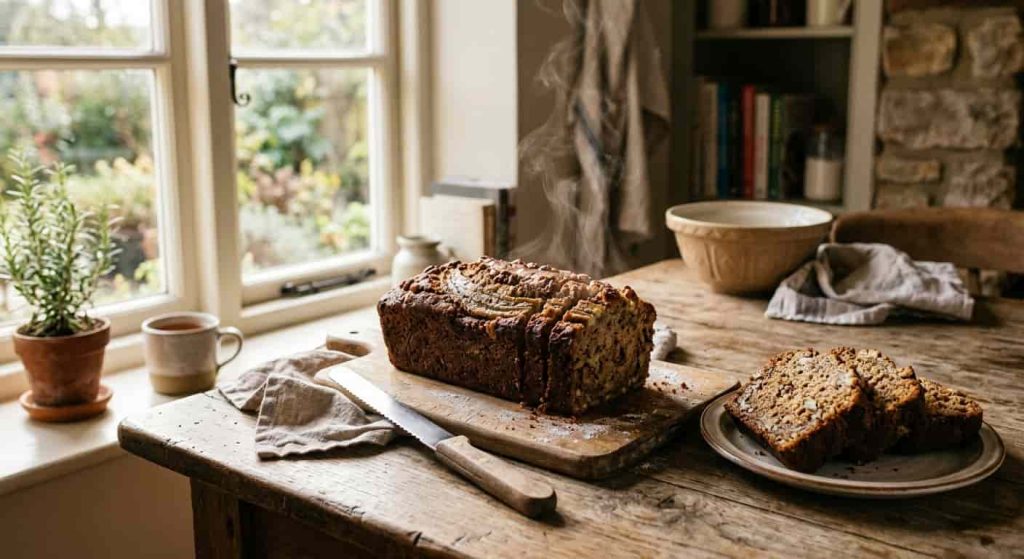
And a homemade banana bread recipe coming out of the oven? That smell practically turns a kitchen into a magnet.
I still remember opening the oven once and thinking, Wait… why does this smell almost like caramel and toasted nuts mixed together? I wasn’t even hungry five minutes earlier. Suddenly I was standing in front of the oven door like a person waiting outside a concert venue.
Funny thing is, that smell isn’t kitchen magic.
It’s chemistry.
Real chemistry.
Tiny molecules are crashing into each other while heat transforms boring ingredients into something that smells nostalgic and comforting. Sounds dramatic, I know. But that’s exactly what’s happening.
Most people think great banana bread comes from secret family recipes. Or expensive ingredients. Or luck.
Not really.
Here’s the deal: incredible banana bread usually comes down to understanding a few small details that most people ignore.
Things like:
- Why black bananas beat yellow bananas
- Why some loaves rise beautifully while others collapse in the center
- Why one loaf tastes rich and soft while another turns into a gummy brick
- Why your loaf somehow tastes better the next day
And yes, there is science hiding inside every slice.
If you’ve ever searched for an easy banana bread recipe and ended up with a loaf that’s dry enough to absorb all moisture from your mouth… you’re not alone.
I’ve been there.
You follow every instruction perfectly.
Mash bananas.
Mix ingredients.
Bake.
Wait patiently.
Then you cut the loaf and think:
“Why does mine look sad?”
Let’s fix that.
Because once you understand what bananas are doing behind the scenes, everything changes.
Why Black Bananas Are Basically Tiny Sugar Factories
People panic when bananas turn black.
I get it.
The peel looks questionable.
It feels softer than expected.
Maybe it’s leaking a little liquid.
Most people think:
“These are ruined.”
Actually, they’re just getting started.
The strange banana transformation
Bananas release something called ethylene gas as they age.
Think of ethylene as the fruit’s internal alarm clock.
It tells the banana:
“Time to change.”
That signal activates enzymes called amylases.
Tiny workers begin chopping large starch molecules into smaller sugars.
The process looks something like this:
Starch → Glucose → Fructose → Sweetness explosion
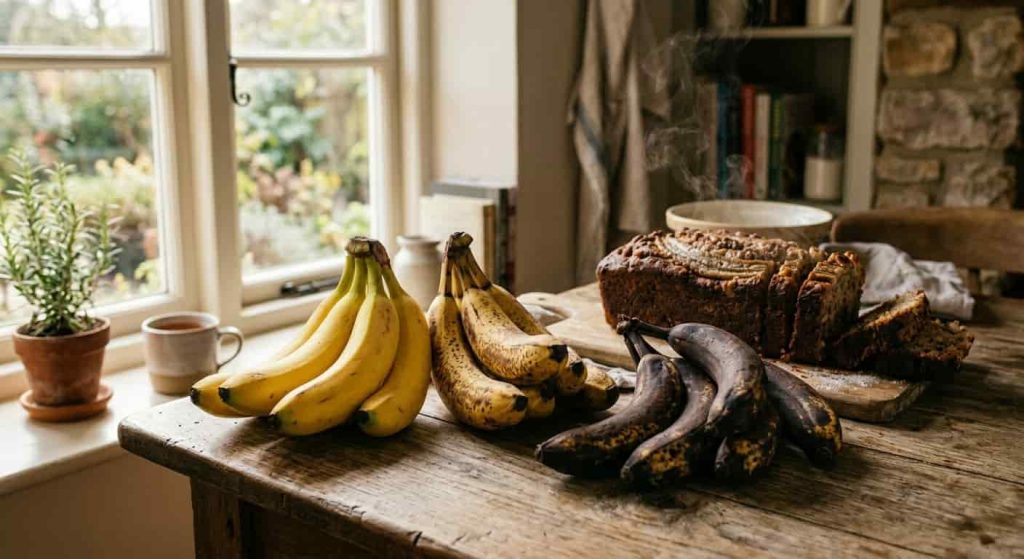
At the beginning:
- Green bananas contain lots of starch
- Yellow bananas sit somewhere in the middle
- Brown and black bananas contain much more simple sugar
That’s why a truly ripe banana tastes dramatically sweeter.
And here’s something interesting.
Fructose actually tastes sweeter to our taste receptors than regular table sugar.
So an overripe banana can provide stronger sweetness without needing mountains of extra sugar in your batter.
That means your basic banana bread recipe doesn’t need to rely heavily on refined sugar.
Pretty nice trade-off.
Why yellow bananas disappoint
This is where many bakers accidentally sabotage themselves.
A banana with a few little spots may look ready.
It isn’t.
Not really.
Yellow bananas still hold a lot of structural starch.
The flavor hasn’t fully developed yet.
The natural sugars haven’t reached their peak.
So if your banana loaf bread recipe tastes flat or weak, your bananas may be the culprit.
For the deepest flavor, you want bananas that are:
- Mostly dark brown or black
- Very soft
- Slightly glossy or weeping liquid
- Strongly fragrant
Those bananas might look ugly.
Ugly wins.
Every time.
Food waste gets a happy ending
Bananas happen to be one of the most wasted foods around the world.
People throw them out constantly.
One day they look perfect.
Two days later they look suspicious.
Three days later they’re in the trash.
Which is a shame.
Because overripe bananas are often more valuable than fresh ones when making a banana and bread recipe.
Instead of becoming waste, they become:
- Natural sweeteners
- Moisture boosters
- Flavor enhancers
- Texture builders
That’s quite a career change for a fruit sitting on your counter.
The Science Behind That Dark Golden Crust
Have you ever looked at banana bread and wondered why the outside becomes deep brown while the inside stays soft?
There’s a reason.
Actually, there are two reasons.
Sugar.
And heat.
Meet the famous kitchen reaction
Scientists call it the Maillard reaction.
Sounds complicated.
It’s not.
Imagine amino acids and sugars meeting under heat and creating hundreds of new flavor compounds.
That’s where you get:
- Toasted notes
- Caramel aromas
- Nutty flavors
- Deep brown color
Without this reaction, baked foods would taste surprisingly boring.
Bread would be pale.
Cookies would seem flat.
Your favorite simple banana nut bread recipe would lose much of its personality.
Why banana bread browns faster
Banana bread contains lots of reducing sugars.
Especially when using overripe fruit.
Those sugars become highly reactive under oven heat.
So the outer surface begins browning quickly.
Sometimes too quickly.
You know what I’m talking about.
The loaf looks beautifully done after thirty minutes.
You feel proud.
Then you cut into it and discover the center is still raw.
Classic betrayal.
Professional bakers already expect this.
They use a small trick.
The aluminum foil trick professionals quietly use
Around the 30-minute mark, loosely place aluminum foil over the loaf.
Not wrapped tightly.
Just a gentle tent.
This slows down surface browning while giving the center extra time.
The inside keeps baking.
The outside stays protected.
Simple move.
Huge difference.
Why aroma fills the entire house
Ever notice that banana bread somehow reaches every room?
Even rooms far away?
Your kitchen isn’t exaggerating.
Heat releases volatile aromatic compounds into the air.
Those tiny molecules travel fast.
Your brain interprets them as:
“Something amazing is happening nearby.”
And suddenly people who claimed they weren’t hungry start wandering into the kitchen.
Mysterious, isn’t it?
Not really.
Science just smells delicious.
The Banana Bread Recipe That Changes Everything
Now we get to the fun part.
Most people think baking is all about tossing ingredients into a bowl and hoping the oven feels generous that day.
Sometimes you get lucky.
Sometimes you end up staring at a loaf that resembles a collapsed pillow.
The difference between those two outcomes often comes down to sequence.
Not ingredients.
Sequence.
Professional bakers know this. Test kitchens know this. Food scientists know this.
Tiny changes in order create huge changes in texture.
So before making this banana bread recipe, don’t think of it as simply mixing ingredients.
Think of it as building structure.
You’re constructing a loaf.
Ingredients for a soft, rich banana loaf
This recipe creates one standard loaf.
You’ll need:
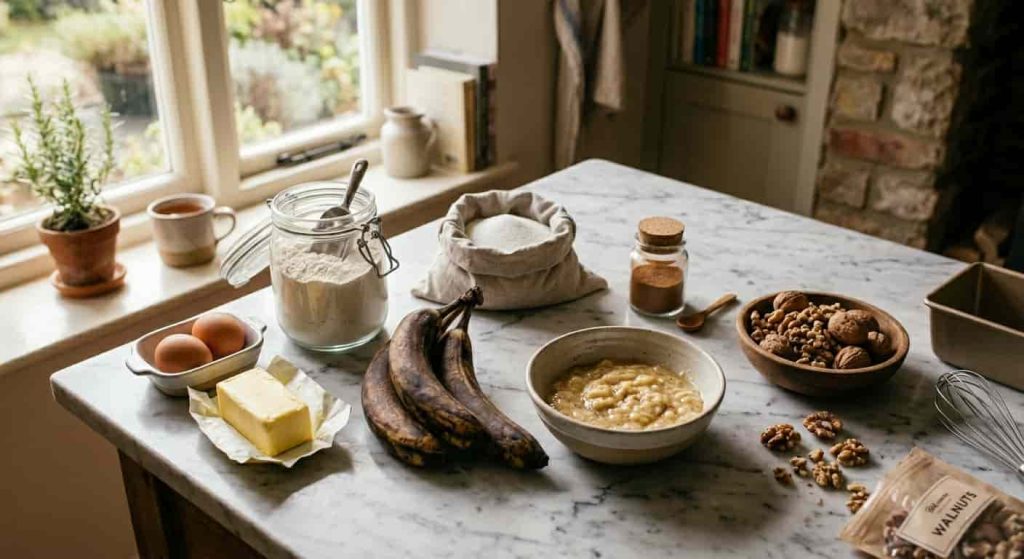
Dry ingredients
- 2 cups all-purpose flour (around 250g)
- 1 teaspoon baking soda
- ½ teaspoon salt
- 1 teaspoon cinnamon (optional)
Wet ingredients
- 3 very overripe bananas
- ½ cup softened butter
- ¾ cup sugar
Remember earlier when we talked about banana sugars becoming stronger with ripeness?
If your bananas are extremely black and sweet, you can comfortably reduce sugar slightly.
- 2 eggs
- 1 teaspoon vanilla extract
- ¼ cup plain yogurt or milk
Optional additions:
- Chopped walnuts
- Pecans
- Dark chocolate chips
- A pinch of nutmeg
This can easily become your favorite simple banana nut bread recipe if you add toasted walnuts.
Trust me on toasted walnuts.
There’s something almost unfair about how much better they taste.
The Crumb Structure Rule Professionals Follow
Here’s where many home bakers accidentally ruin things.
They throw bananas into butter and sugar immediately.
Seems harmless.
It isn’t.
Step 1: Cream butter and sugar first
Beat softened butter with sugar until light and fluffy.
Take your time.
You’re creating tiny air pockets.
Those microscopic pockets later help support the loaf while baking.
Think of them as little balloons inside your batter.
Step 2: Add eggs
Add eggs one at a time.
Mix gently.
The mixture should look smooth.
Not curdled.
Not lumpy.
Step 3: Mix dry ingredients separately
In another bowl combine:
- Flour
- Baking soda
- Salt
- Cinnamon
Simple.
Step 4: Add dry ingredients and banana mixture gradually
Alternate:
Dry ingredients → banana mixture → dry ingredients → banana mixture
Then stop.
Seriously.
Stop mixing.
This matters.
Why overmixing creates disappointment
Flour contains proteins.
When those proteins meet water and movement, they begin linking together.
That network becomes gluten.
Gluten is wonderful in bread.
Too much gluten in banana bread?
Not wonderful.
Now your loaf becomes:
- Dense
- Tough
- Chewy
- Heavy
Nobody wants banana-flavored rubber.
For a soft easy banana bread recipe, mix only until ingredients disappear.
A few streaks are fine.
Tiny lumps are fine.
Perfection isn’t required.
Case Study: The Gummy Vortex Disaster
This problem confuses people constantly.
You bake your loaf.
The top looks perfect.
The smell fills the house.
You cut into it and suddenly notice something strange:
The bottom inch looks wet and rubbery.
Almost like banana pudding settled there.
Welcome to the gummy vortex.
Sounds dramatic.
Feels worse.
What causes it?
Many people aggressively blend bananas.
Food processors.
Blenders.
Electric mixers.
The bananas become completely liquid.
Seems efficient.
Actually, it creates problems.
Professional test kitchens discovered that ultra-pureed bananas release too much free moisture.
Gravity takes over.
During baking that liquid slowly sinks toward the bottom before the structure sets.
Result?
Wet, heavy layers.
The fix
Mash bananas with:
- Forks
- Potato mashers
- Large spoons
Leave tiny chunks.
Small pieces of fruit act like little moisture reservoirs.
They hold onto water during baking.
You get softness without creating a swamp at the bottom.
Funny how being less perfect creates better results.
The Secret Weapon: Roast and Drain Method
This technique feels almost sneaky.
And once you try it, normal banana bread starts feeling slightly disappointing.
Here’s what you do.
Step 1: Roast the bananas
If your bananas are ripe but not fully black:
- Place unpeeled bananas on a tray
- Bake at 300°F (150°C)
- Roast for around 20 minutes
The skins become black.
Don’t panic.
That’s exactly what you want.
Step 2: Let them drain
After cooling:
- Peel bananas
- Place them into a mesh strainer
- Put a bowl underneath
Wait 15 minutes.
You’ll notice clear liquid collecting below.
Most people throw it away.
Don’t.
Step 3: Reduce the liquid
Pour that liquid into a small pan.
Heat gently.
Reduce it until it becomes thick syrup.
Then stir it back into the batter.
Sounds tiny.
Tastes huge.
Why?
Because now you’re concentrating flavor without increasing moisture.
You get:
- Stronger banana taste
- Better sweetness
- Richer aroma
- Softer texture
Without making the loaf gummy.
Professional bakers quietly love tricks like this.
Why Baking Soda Is Non-Negotiable
This myth shows up constantly.
Someone says:
“I don’t have baking soda. I’ll use baking powder instead.”
No.
Please don’t.
Let’s talk about why.
Bananas are naturally acidic.
Baking soda reacts with acid.
That reaction creates carbon dioxide bubbles.
Those bubbles lift heavy batter upward.
Without enough baking soda:
- The loaf stays dense
- Flavor feels flat
- Texture becomes heavy
- Rise becomes weak
Think of baking soda as the engine.
Without the engine, the car still exists.
It just isn’t moving.
Replacing it entirely in a basic banana bread recipe can leave you with what I lovingly call:
A banana brick.
Baking Day: The Small Details That Decide Everything
By this point your batter is sitting in the bowl looking thick, rich, and smelling suspiciously good already.
Now comes the stage where people suddenly get overconfident.
I’ve done it myself.
You think:
“Great batter means guaranteed success.”
Not always.
The oven still gets a vote.
And ovens can be sneaky little creatures.
One oven runs hot.
Another runs cool.
Some have mysterious hot spots that seem determined to burn one corner of everything.
So the final stage matters.
Preparing the loaf pan
Before pouring in your batter:
- Grease the loaf pan lightly
- Line it with parchment paper if possible
- Leave a little paper hanging over the sides
Those paper edges become handles later.
Your future self will appreciate that.
Pour the batter in and smooth the top gently.
Don’t press down aggressively.
No wrestling match is required.
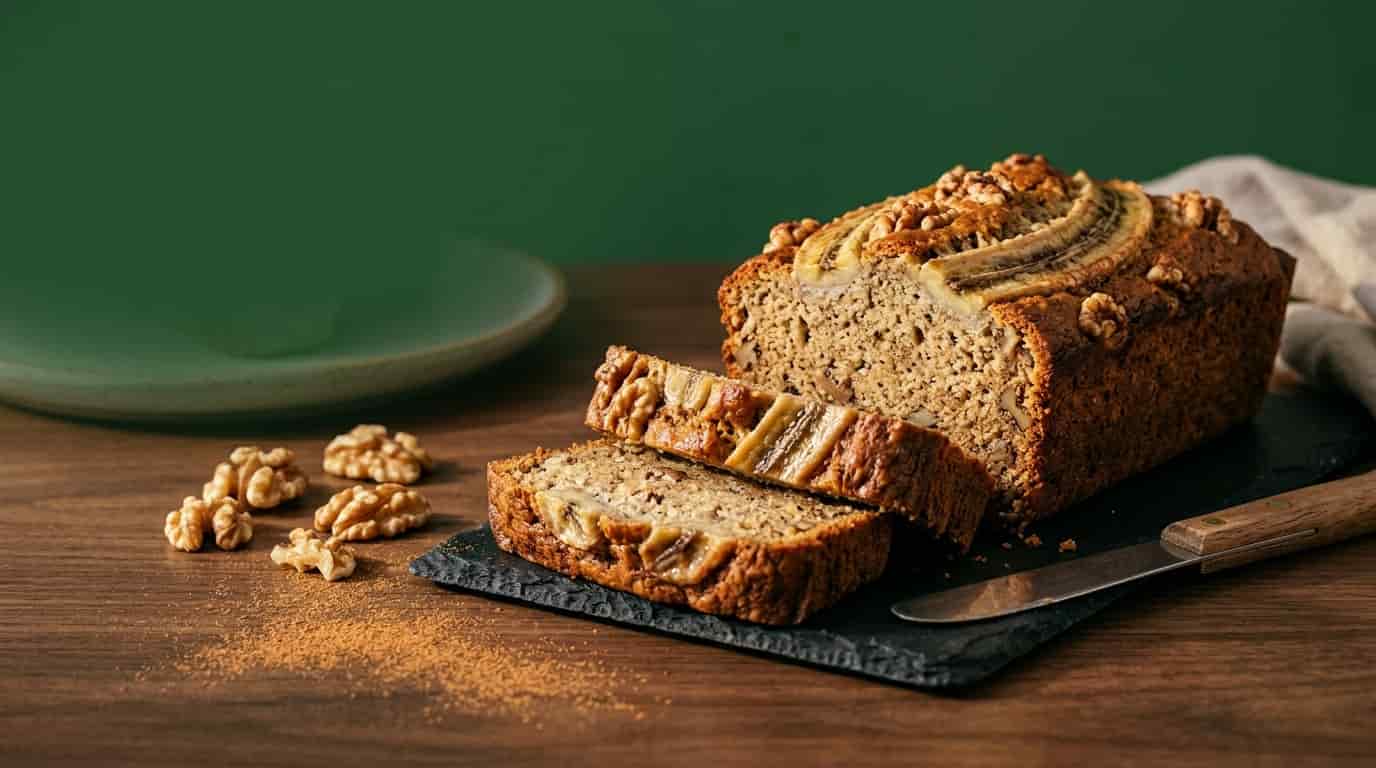
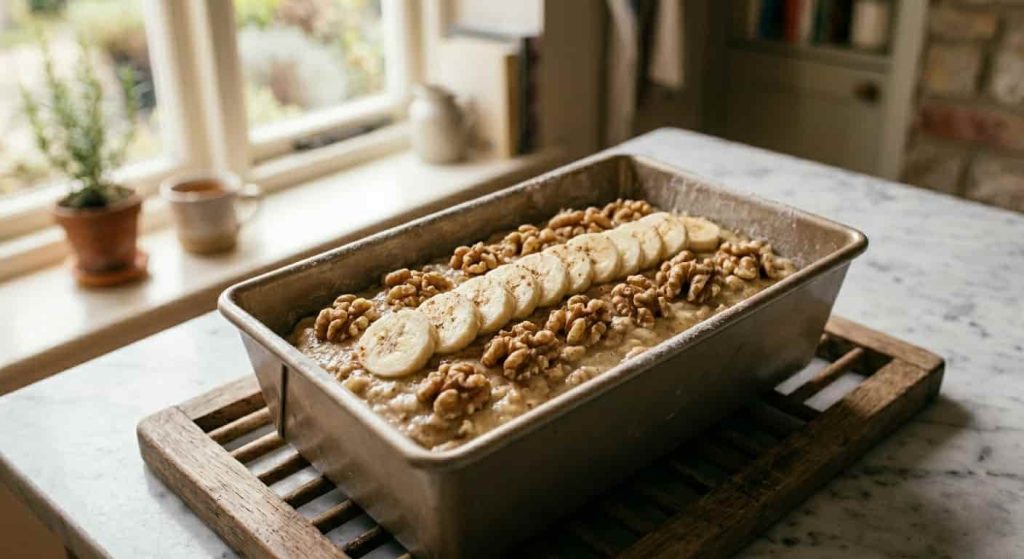
Optional topping trick
Want your loaf to look bakery-worthy?
Slice one banana lengthwise and place it on top.
Sprinkle lightly with:
- Brown sugar
- Cinnamon
- Crushed walnuts
That topping becomes soft, caramelized, and ridiculously pretty.
People suddenly assume you attended pastry school.
No need to correct them.
The Internal Temperature Secret Nobody Talks About
Most people use visual clues:
“Looks brown enough.”
“Smells done.”
“Probably ready.”
That’s kitchen gambling.
Banana bread is dense.
Very dense.
Its outside often finishes long before the middle does.
Earlier we talked about the intense sugar activity happening during baking. Those sugars brown rapidly.
That beautiful crust can trick you.
Professional bakers often use internal temperature.
For banana bread, the center should reach around:
200°F (93°C)
That’s usually the sweet spot.
No thermometer?
No problem.
Insert a toothpick into the center.
Here’s the important part:
People think it must come out perfectly clean.
Not quite.
A few moist crumbs attached?
Perfect.
Wet batter?
Needs more time.
Dry and completely crumb-free?
You may already be moving toward dry territory.
The Sunken Center Crisis
This one hurts.
Especially emotionally.
You pull out a loaf that looks magnificent.
Tall.
Golden.
Beautiful.
Then ten minutes later…
Disaster.
The center slowly sinks downward.
Like a tiny cake landslide.
You stare at it in disbelief.
“Why?”
Case Study: Too much banana chaos
Food experts see this problem constantly.
Someone decides:
“I love bananas, so more bananas should mean better banana bread.”
Makes sense logically.
Baking disagrees.
Imagine using:
- Recipe requires 3 bananas
- Baker uses 6 bananas
The loaf rises dramatically in the oven because of steam.
Everything looks amazing.
But structure never develops enough strength.
As cooling begins, gravity wins.
The center collapses.
Why this happens
Bananas contain:
- Moisture
- Sugars
- Pectin
What they don’t contain:
- Gluten structure
- Protein support
Professional bakers often follow a rough rule:
Banana pulp should stay below roughly 90% of flour weight
Example:
- 200g flour
- Around 180g banana pulp maximum
Go much beyond that and your loaf enters dangerous territory.
Why Banana Bread Somehow Tastes Better Tomorrow
This surprises people.
Fresh-from-the-oven banana bread is wonderful.
Warm.
Soft.
Comforting.
But Day 2?
Day 2 often wins.
Seriously.
The overnight flavor shift
During resting:
- Moisture redistributes
- Sugars settle
- Aroma compounds mature
- Texture evens out
The crust softens slightly.
The middle becomes richer.
The banana flavor deepens.
It’s almost like the loaf relaxes overnight.
I know people who intentionally bake banana bread at night so they can eat it the next morning.
That level of patience deserves respect.
Not sure I personally have that level of self-control.
Storage Tips So Your Loaf Doesn’t Turn Sad
Homemade banana bread keeps moisture very well because bananas naturally contain pectin and water-binding sugars.
Still, storage matters.
Room temperature
Store in:
- Airtight containers
- Wrapped foil
- Plastic wrap
Usually good for:
3–4 days
Refrigerator
Can last:
Up to one week
Although refrigeration sometimes changes texture slightly.
Freezer
Wrap individual slices tightly.
Store for:
2–3 months
Future-you gets surprise banana bread.
Future-you will be thrilled.
Quick Troubleshooting Guide
Problem: Dense loaf
Possible causes:
- Too much flour
- Overmixing
- Weak baking soda
Problem: Gummy bottom
Possible causes:
- Over-pureed bananas
- Excess moisture
- Too much fruit
Problem: Dry texture
Possible causes:
- Overbaking
- Too little banana
- Too much flour
Problem: Burned top
Possible causes:
- No foil tent
- Oven temperature too high
Problem: Center collapses
Possible causes:
- Excess banana pulp
- Underbaking
- Too much moisture
Frequently Asked Questions
Can I make an easy banana bread recipe without nuts?
Absolutely.
Nuts are optional.
The loaf stays soft and delicious without them.
Can frozen bananas work?
Yes.
Actually, frozen bananas often become extremely soft after thawing.
Just drain excess liquid if necessary.
Can I reduce sugar?
Yes.
Very ripe bananas naturally become sweeter, so you can often cut added sugar significantly.
Why did my banana bread crack on top?
That’s normal.
Very normal.
As the loaf rises, the surface sets and splits naturally.
Many bakery loaves intentionally encourage that crack.
Can whole wheat flour replace all-purpose flour?
Partially works best.
Try replacing around 25–50%.
Using only whole wheat flour may create a heavier loaf.
Final Thoughts
A great banana bread recipe isn’t really about perfection.
It’s about understanding tiny moments.
Black bananas sitting forgotten on a counter.
Small air pockets inside butter.
A loose sheet of foil halfway through baking.
A few banana chunks left unmixed.
Tiny decisions.
Big rewards.
And maybe that’s why banana bread has stayed popular for generations.
It takes ingredients that look ordinary—even ingredients some people would throw away—and turns them into something warm and comforting.
A loaf that fills a room with caramel notes.
A loaf that mysteriously disappears slice by slice.
A loaf that somehow tastes even better tomorrow.
Long story short?
The next time your bananas turn black, don’t see old fruit.
See future dessert.
And possibly breakfast too.
Read More Article: 7 Genius Ways to Ripen Bananas Instantly (From 15 Minutes to Overnight)
Disclaimer: This content is for educational and food information purposes and is not medical or nutritional advice.