Have you ever wanted a bakery-style breakfast treat but absolutely did not want to spend your Saturday morning wrestling with yeast, rolling pins, or a mountain of dirty dishes?
That’s exactly where breakfast puffs come in.
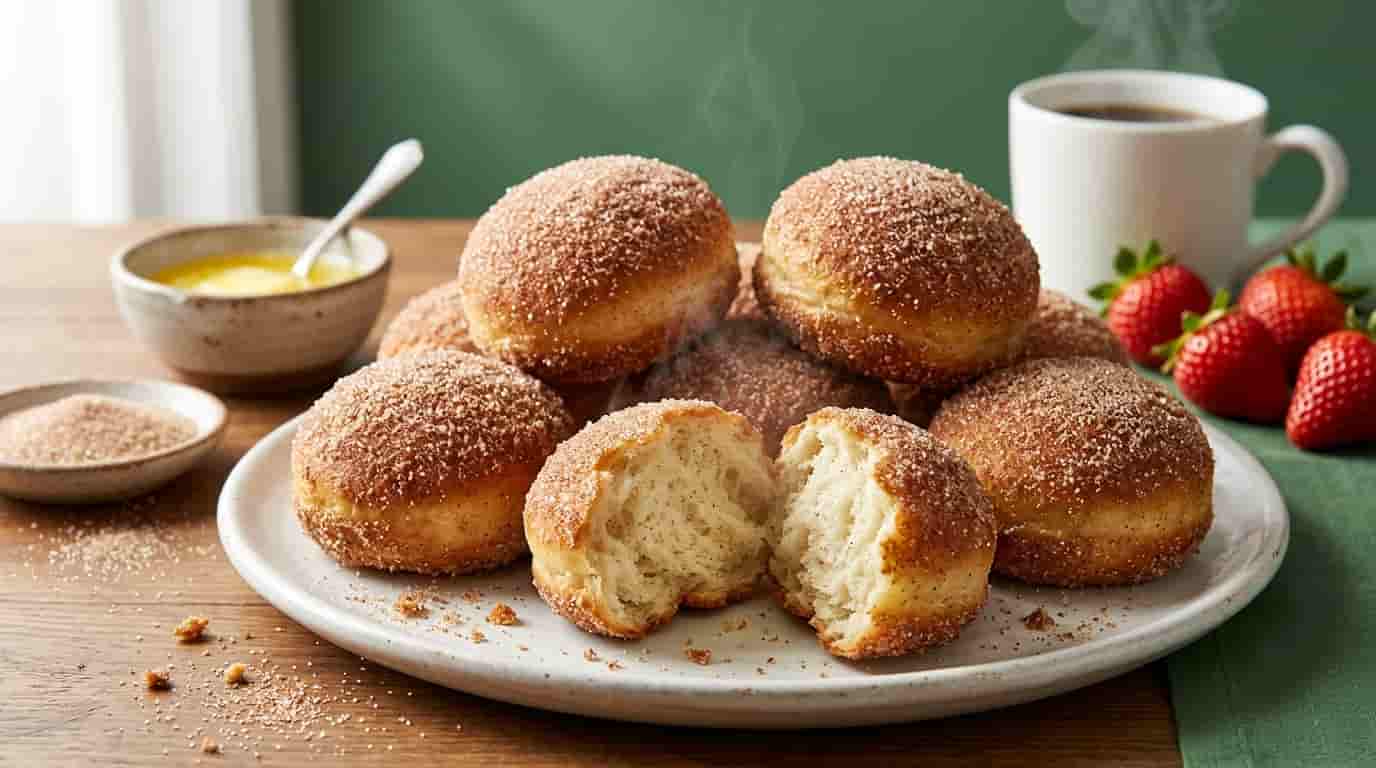
These little cinnamon-sugar bites look a bit like doughnut holes, but they’re much easier to make. The batter comes together in minutes, the puffs bake in a mini muffin tin, and then the warm little cakes take a luxurious dip in melted butter before being rolled in cinnamon sugar. The result? A tender, fluffy center with a sweet, buttery coating that makes an ordinary morning feel suspiciously fancy.
And yes, I’ve been known to eat one “just to test it” before breakfast. Then another. Strictly for quality control, obviously.
In this guide, I’ll show you how to make classic breakfast puffs, how to keep their crumb light instead of heavy, how to adapt them for gluten-free or dairy-free diets, and how to store and reheat them without turning that gorgeous cinnamon-sugar coating into a sticky mess.
What Are Breakfast Puffs?
Breakfast puffs are small, tender baked pastries made from a simple muffin-like batter and finished with butter and cinnamon sugar. Think of them as the cheerful middle ground between a miniature muffin and a baked doughnut hole.
They don’t require yeast. There’s no proofing. No complicated shaping.
That’s part of their charm.
The classic version uses a lightly sweetened vanilla batter with warm nutmeg, which gives the finished puffs that old-fashioned bakery flavor. After baking, each puff is brushed or dipped in melted butter and generously coated with cinnamon sugar.
The outside becomes sweet and fragrant while the inside stays soft.
Why the Texture Is So Special
The trick is in the batter.
Unlike a dense breakfast cake, the mixture should be stirred only until the dry ingredients are incorporated. Overmixing develops more gluten in the flour, which can make the finished puffs chewy or heavy rather than delicate.
A little patience helps here.
You want the batter to look combined, not perfectly silky. A few tiny lumps aren’t a problem.
Once baked, the mini muffin shape gives every puff plenty of surface area for that buttery cinnamon coating. That’s why these disappear so quickly from a breakfast tray.
Are They Actually French?
Here’s the slightly confusing part.
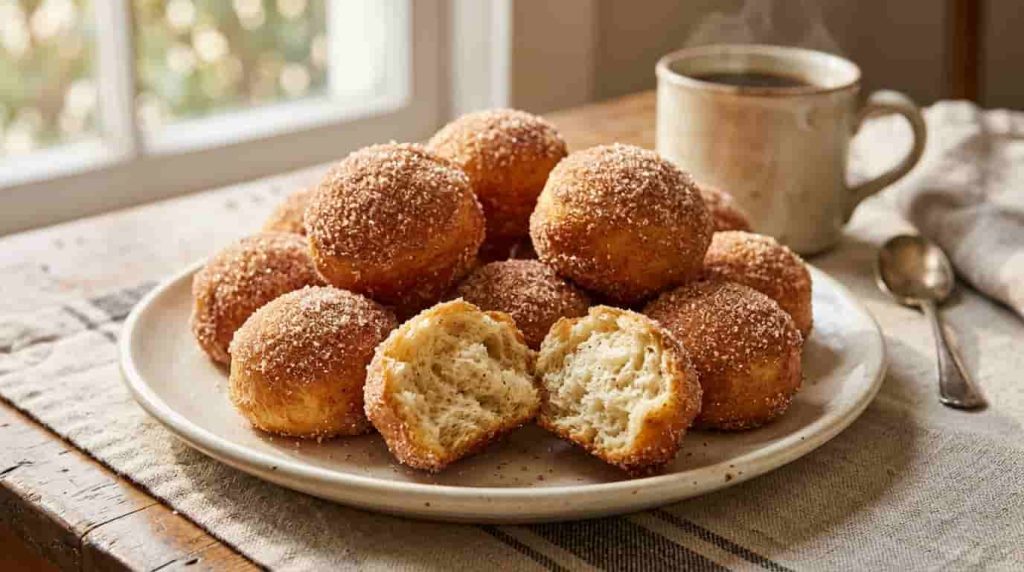
You’ll often see these called French breakfast puffs or French breakfast muffins. Despite the name, the recipe isn’t generally considered a traditional French pastry in the way a croissant or pain au chocolat is.
The name is associated with the style and presentation of the recipe rather than a strict claim of French culinary origin.
So if you’re expecting a pastry that requires laminated dough and three hours of folding butter into flour, relax.
This isn’t that kind of morning.
Instead, you get a simple baked treat with a warm cinnamon-and-nutmeg flavor and a buttery sugar finish.
What Makes Them Different From Doughnut Holes?
The resemblance is definitely there, but the cooking method is different.
Traditional doughnut holes are usually made from dough and may be fried, while breakfast puffs are made from a muffin-style batter and baked.
That difference matters.
Because they’re baked, these puffs have a softer, cake-like interior rather than the slightly chewy structure associated with many fried doughnuts. The butter-and-sugar coating gives them some of that indulgent doughnut appeal without requiring a pot of hot oil.
For a relaxed weekend breakfast, that’s a pretty good trade.
Ingredients for the Perfect Batch
The ingredient list is refreshingly short. You don’t need specialty baking ingredients or an intimidating pantry.
The quality of a few basic ingredients, however, makes a noticeable difference.
Muffin Batter Staples
For a classic batch, you’ll need:
- All-purpose flour
- Granulated sugar
- Baking powder
- Salt
- Ground nutmeg
- Unsalted butter
- Milk
- An egg
- Vanilla extract
Each ingredient has a job.
Flour provides the structure. Baking powder creates lift. The egg helps bind the batter while contributing richness, and milk keeps the crumb tender.
Then there’s nutmeg.
Don’t skip it if you want that familiar old-fashioned flavor. You don’t need much, but even a modest amount gives these nutmeg spiced muffins their signature warmth.
Why Fresh Nutmeg Can Be Worth It
If you have whole nutmeg in your spice drawer, this is a great recipe to use it.
Freshly grated nutmeg has a noticeably more aromatic character than ground nutmeg that’s been sitting open for months. The flavor is warm, slightly sweet, earthy, and wonderfully suited to cinnamon.
You don’t need to grate half the spice jar.
A small amount is enough.
The Cinnamon-Sugar Coating
This is where the humble puff becomes something special.
You’ll need:
- Granulated sugar
- Ground cinnamon
- Melted unsalted butter
I like a cinnamon-to-sugar ratio that gives you obvious cinnamon flavor without making the coating taste bitter. Start moderately; you can always add more cinnamon.
The butter is important, too.
It isn’t merely there for richness. It acts as the sticky layer that helps the cinnamon sugar cling to the baked surface.
And that coating is half the fun.
Optional Flavor Upgrades
Once you’ve made the classic version, there are several easy ways to personalize the recipe.
Try one of these:
- Orange zest: Adds a bright citrus note that cuts through the richness.
- Brown butter: Gives the puffs a deeper, toasted flavor.
- Extra vanilla: Great when you want a softer, sweeter aroma.
- Cardamom: A small pinch creates a more fragrant, bakery-style variation.
- Maple sugar: Can add a subtle caramel-like character to the coating.
I wouldn’t add all of these at once.
Pick one.
Breakfast shouldn’t require a laboratory.
How to Make Breakfast Puffs Step-by-Step
The process is simple, but a few small choices can make the difference between light, tender puffs and dense little cakes.
Step 1 – Prepare the Pan
Start by preheating your oven and preparing a mini muffin tin.
Grease the wells thoroughly, especially around the sides. These puffs are small, and you don’t want half of your cinnamon-sugar masterpiece left behind in the pan.
A light coating of baking spray or softened butter works well.
If your pan tends to stick, give the wells a little extra attention.
Step 2 – Mix the Dry Ingredients
In a medium bowl, whisk together the flour, baking powder, salt, sugar, and nutmeg.
This step looks boring.
It isn’t.
Evenly distributing the baking powder and spices before adding the wet ingredients helps prevent pockets of leavening or spice in the finished puffs.
Step 3 – Combine the Wet Ingredients
In another bowl, whisk together the melted butter, milk, egg, and vanilla.
Make sure the melted butter isn’t scorching hot. Very hot butter can partially cook the egg when the two meet, which isn’t exactly the texture we’re after.
Warm or cooled melted butter is much safer.
Step 4 – Bring the Batter Together
Pour the wet mixture into the dry ingredients.
Then stir gently.
Stop as soon as you no longer see large streaks of dry flour.
This is one of those moments when less effort produces a better result. You aren’t trying to beat air into the batter. You’re simply bringing the ingredients together.
Overmixing is one of the easiest ways to create dense breakfast puffs.
Step 5 – Fill the Mini Muffin Tin
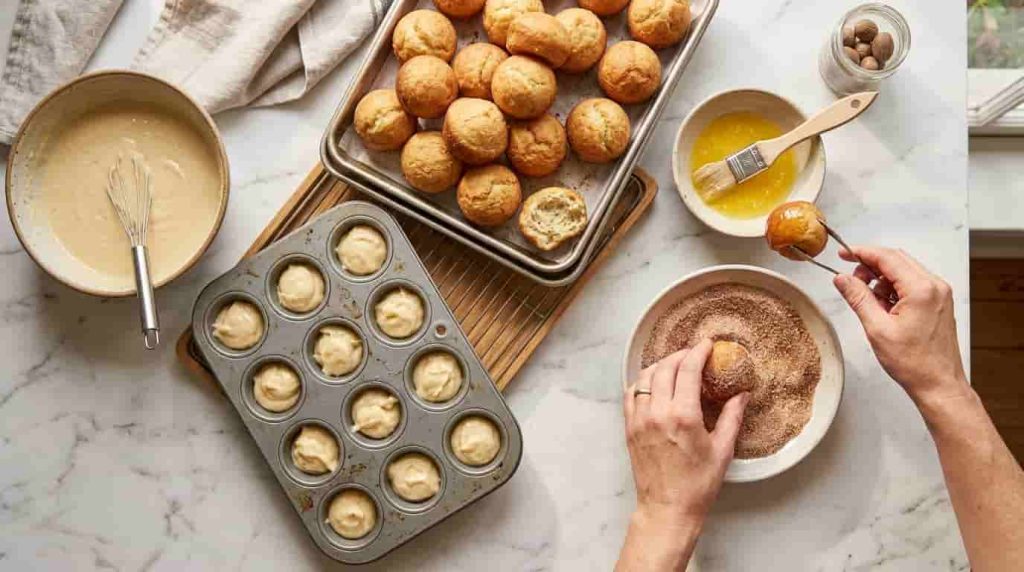
Spoon the batter into the prepared wells, filling each roughly two-thirds to three-quarters full.
Try to keep the portions reasonably even.
Why?
Because smaller puffs can finish baking before larger ones, leaving you with a mixed batch of pale and overly browned pieces.
A small cookie scoop makes portioning much easier if you have one.
Step 6 – Bake Until Golden
Bake the mini puffs until they’re lightly golden and a toothpick inserted into the center comes out clean or with only a few moist crumbs.
Don’t wait for them to become deeply brown.
These are meant to be soft.
An overbaked breakfast puff can lose the tender texture that makes the recipe special. Since oven temperatures vary, start checking toward the earlier end of your expected baking window rather than blindly relying on the clock.
Let them cool just enough to handle.
You want them warm for the next step.
The Butter Dip & Cinnamon-Sugar Finish
Now comes my favorite part.
Melt the butter in a small bowl. In another bowl, combine the sugar and cinnamon.
Take one warm puff.
Dip or brush it lightly with melted butter.
Then roll it through the cinnamon sugar.
That’s it.
No glaze. No complicated frosting. No pastry bag hiding somewhere in the back of a kitchen drawer.
How Much Butter Is Too Much?
Here’s the deal: more butter doesn’t automatically mean better puffs.
If you completely saturate the outside, the sugar coating can become wet and heavy. You may also end up with a greasy bottom after the puffs sit for a while.
A light, even coating is usually enough.
Think butter-kissed, not butter-soaked.
The cinnamon sugar should cling to the surface while still retaining that delicate crystalline texture.
And if you happen to lose one puff during the dipping process?
Well.
The cook has to sample the evidence.
That’s just science.
Cooking Variations & Methods
The classic oven-baked method is hard to beat, but breakfast puffs are surprisingly flexible.
Once you’ve got the basic batter down, you can adjust the recipe for different equipment or dietary needs without turning it into an entirely different breakfast.
Air Fryer Breakfast Puffs
Yes, you can make small breakfast puffs in an air fryer, although the result can vary depending on the size and design of your air fryer.
The biggest issue is space.
Mini muffin batter needs some structure while it cooks, so don’t simply drop spoonfuls directly onto the air-fryer basket. You’ll need a small silicone mold or another air-fryer-safe baking vessel designed for mini portions.
For best results:
- Preheat the air fryer according to the manufacturer’s instructions.
- Use a small silicone mini-muffin mold that fits comfortably inside the basket.
- Fill each cavity about two-thirds full.
- Cook at a moderate temperature rather than blasting the batter with maximum heat.
- Start checking early because small portions cook quickly.
- Let the puffs rest for a few minutes before coating.
Air fryers circulate hot air aggressively, so the outside can brown faster than the center cooks.
That’s why I wouldn’t rely on appearance alone.
A toothpick inserted into the center is your friend.
Why Air Fryer Timing Isn’t Exactly the Same
A conventional oven surrounds the pan with relatively steady heat, while an air fryer moves hot air rapidly around the food.
That changes browning.
It also means there isn’t one universal air-fryer time that works for every machine. Basket size, heating element placement, mold material, and even how many puffs you’re cooking can affect the result.
Start conservatively.
You can always give them another minute or two.
You can’t un-bake a dry puff.
Gluten-Free Breakfast Puffs
Want gluten-free breakfast muffins?
The easiest approach is a quality 1:1 gluten-free flour blend intended for baking.
Look for one formulated to replace wheat flour cup-for-cup. Many blends contain a combination of rice flour, starches, and a binder such as xanthan gum.
Still, every blend behaves a little differently.
Some absorb more liquid than standard all-purpose flour. Others produce a slightly softer or more crumbly texture.
If your batter looks unusually thick after mixing, don’t immediately dump in a large amount of milk. Give the flour a moment to hydrate, then assess the consistency.
The finished puffs may be slightly more delicate than the wheat-based version.
That’s normal.
Dairy-Free Breakfast Puffs
For a dairy-free version, replace regular butter with a dairy-free baking stick or plant-based butter that behaves similarly when melted.
Use your favorite unsweetened dairy-free milk in the batter.
Oat milk, soy milk, and many other dairy-free options can work well, although flavor and texture may vary between brands.
One thing I wouldn’t recommend is replacing butter with a very watery milk alternative and expecting the exact same richness.
Butter contributes both fat and flavor.
A good plant-based butter gets you much closer to the original texture.
Egg-Free Adaptations
This recipe relies on egg for structure and richness, so an egg-free substitution can change the crumb.
If you need to avoid eggs, use a reliable baking egg replacer rather than simply adding more milk.
The goal isn’t merely to replace the liquid volume.
You need something that helps bind the ingredients together during baking.
For anyone baking around significant food allergies, check every packaged ingredient carefully, including flour blends, plant-based butter, and baking mixes.
Cross-contact can happen in unexpected places.
Pro Tips for a Lighter, Better Texture
The ingredients matter.
But technique matters just as much.
A few small habits can turn an average batch of breakfast puffs into the soft, tender kind people keep reaching for.
Don’t Overmix the Batter
This is probably the most important tip.
Once the flour meets liquid, gluten development begins. Some gluten is necessary because it gives the baked puff structure.
Too much?
Now you’ve got a tougher little cake.
Stir until combined, then stop.
You don’t get bonus points for a perfectly smooth batter.
Measure Flour Correctly
Flour is surprisingly easy to overmeasure.
If you scoop directly into a flour container and pack the cup down, you can accidentally add significantly more flour than intended.
For the most consistent result, use a kitchen scale.
If you’re measuring by volume, spoon the flour lightly into the measuring cup and level the top with a straight edge.
That tiny habit can make a noticeable difference.
Use Fresh Baking Powder
Baking powder loses strength over time.
If yours has been hiding in the pantry since you bought your last Halloween costume, it may be time for a replacement.
Weak leavening can leave your puffs flatter and heavier than expected.
A simple freshness check is possible by placing some baking powder in hot water. It should react vigorously.
If the reaction is weak, don’t expect miracles from your muffin tin.
Don’t Overbake
This one sounds obvious.
Yet it’s incredibly common.
Small baked goods can go from tender to dry surprisingly quickly because there’s so little mass.
Look for lightly golden edges and a set center.
You don’t need a deeply browned exterior.
The cinnamon-sugar coating provides plenty of visual appeal later.
Preventing Soggy Bottoms
There’s one complaint I hear often with butter-coated breakfast pastries:
“My puffs were delicious, but the bottoms got soggy.”
Usually, the culprit isn’t the recipe itself.
It’s what happens after the coating.
Let Excess Butter Drain
After dipping each puff, allow excess butter to drip off before rolling it in sugar.
You’re looking for a thin coating.
Not a bath.
Then place the finished puffs on a wire rack rather than immediately stacking them in a bowl.
Airflow underneath helps prevent moisture from collecting on the bottom.
Don’t Cover Them While They’re Hot
This is another sneaky culprit.
When hot puffs are sealed inside a container, steam has nowhere to escape. That moisture eventually condenses on the container and the pastries.
And suddenly your crisp cinnamon sugar has become damp.
Let them cool until they’re warm or near room temperature before covering.
If you’re serving them immediately, a loose arrangement on a plate is perfect.
Why the Sugar Coating Gets Wet
Sugar is hygroscopic, which means it readily attracts moisture from its surroundings.
That matters here.
The butter coating, warm pastry, humid kitchen air, and trapped steam can all contribute to a softer sugar crust over time.
You can’t completely prevent that.
But you can slow it down.
Coat the puffs relatively close to serving time, allow excess butter to drain, and avoid trapping them while they’re steaming hot.
How to Get a Fluffy Crumb Instead of a Dense One
A great breakfast puff should feel light when you bite into it.
Not hollow.
Not gummy.
Not like someone accidentally baked a hockey puck.
The Three Biggest Texture Factors
Focus on these:
- Correct flour measurement
- Gentle mixing
- Proper baking time
There’s also a fourth factor: ingredient temperature.
Room-temperature dairy and eggs generally combine more smoothly than ingredients straight from a very cold refrigerator.
You don’t have to obsess over this.
Just avoid combining hot melted butter with a freezing-cold egg and expecting everything to behave perfectly.
What If the Batter Looks Too Thick?
A muffin-style batter should be spoonable.
If yours is extremely stiff, check whether you accidentally added too much flour.
Don’t immediately compensate by pouring in lots of milk.
That can throw off the recipe’s balance.
Instead, compare your measurements first.
Baking is less forgiving than cooking because ratios matter.
You can’t always “eyeball” your way out of an ingredient mistake.
Flavor Variations Worth Trying
Once you’ve mastered the classic cinnamon-sugar version, it’s fun to experiment.
Just don’t change five ingredients at once.
You’ll never know what actually improved the recipe.
Orange-Vanilla Breakfast Puffs
Add finely grated orange zest to the batter along with vanilla.
The citrus oils add a bright aroma without making the puffs taste like orange cake.
For the coating, keep the cinnamon fairly restrained.
Orange and cinnamon can be wonderful together, but too much spice can overpower the citrus.
Brown Butter Version
Brown butter is a little more work.
It’s also completely worth trying.
Melt the butter in a light-colored saucepan and continue cooking until the milk solids turn golden and the butter develops a nutty aroma.
Watch it carefully.
Brown butter can go from beautifully toasted to burnt faster than you’d expect.
Let it cool before adding it to the batter.
You can also use browned butter in the coating, although its deeper flavor may be more noticeable than in the classic version.
Apple-Cinnamon Puffs
For an autumn-inspired variation, finely dice a small amount of apple and fold it gently into the batter.
Keep the pieces tiny.
Large chunks can make the miniature puffs difficult to shape and may introduce extra moisture.
A little apple goes a long way.
Add cinnamon to the batter or coating, and you’ve got something that tastes like a cross between a cinnamon muffin and an apple breakfast cake.
Cardamom-Cinnamon Puffs
This is my choice when I want something slightly more sophisticated.
Add a small pinch of ground cardamom to the batter or cinnamon sugar.
Don’t go wild.
Cardamom has a strong personality.
Used carefully, it adds a floral, almost citrusy note that makes these little pastries taste surprisingly elegant.
What to Serve With Breakfast Puffs
These puffs are sweet, so I like pairing them with something that brings balance to the plate.
A strong cup of coffee is the obvious answer.
But there are other options.
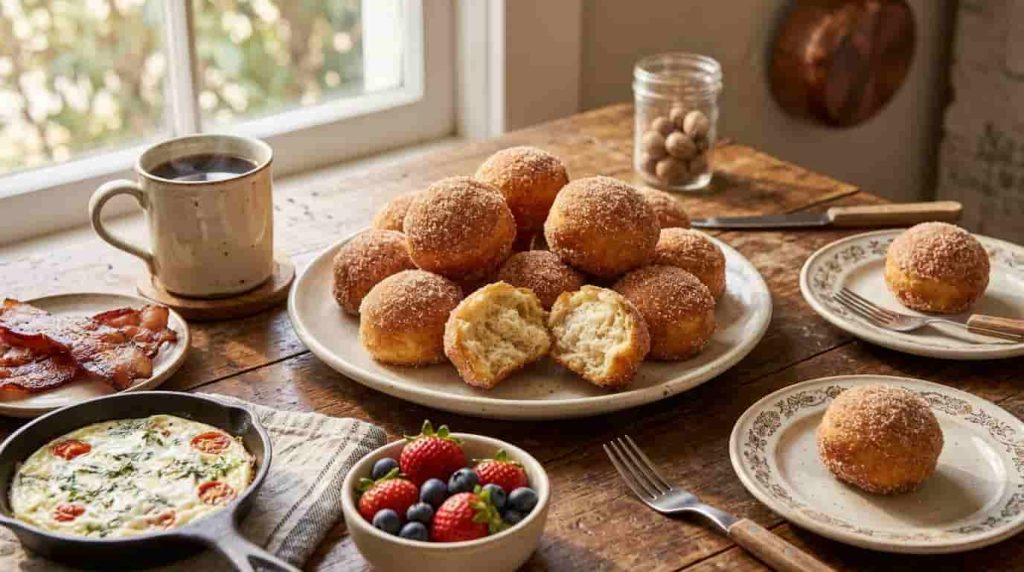
Try serving them with:
- Fresh strawberries
- Blueberries
- Plain Greek yogurt
- Scrambled eggs
- A simple egg white frittata
- Fresh orange slices
- Unsweetened tea
- A handful of nuts
The combination of sweet and savory works particularly well.
For a weekend brunch, I might serve a basket of warm puffs alongside eggs, fruit, and something salty.
And yes, if you’ve been searching for million dollar bacon recipes, that sweet-savory combination can be dangerously good.
Just remember that the puffs themselves are already sweet.
You don’t need to make every item on the plate compete for attention.
Storage, Freezing, and Reheating Guide
Freshly coated breakfast puffs are at their best while they’re still warm.
But let’s be realistic.
Sometimes breakfast happens before the rest of the household wakes up. Sometimes you’re preparing food for guests. And sometimes you simply made too many.
Yes, there is such a thing.
Barely.
Storing at Room Temperature
Allow the puffs to cool completely before storing.
Place them in an airtight container lined with a paper towel.
The paper towel can help absorb some excess moisture, although you don’t want to trap warm steam inside the container.
At room temperature, they’re generally best enjoyed within a couple of days for the nicest texture.
The cinnamon-sugar coating will gradually soften.
That’s unavoidable.
Still delicious.
Just different.
Should You Refrigerate Them?
Usually, refrigeration isn’t necessary for plain breakfast puffs that don’t contain a perishable filling or frosting.
In fact, refrigeration can make baked goods feel firmer and drier because starches change as they cool.
If your kitchen is particularly hot or humid, however, follow sensible food-storage practices and avoid leaving food sitting out for prolonged periods.
When in doubt, use the storage guidance appropriate for the ingredients and your kitchen conditions.
Freezing Before the Butter Coating
If you’re planning ahead, freezing the baked puffs before adding the butter and cinnamon sugar is my preferred approach.
Why?
Because you can thaw and refresh the pastry, then add the coating close to serving.
That gives you a much better chance of getting the fresh-baked texture you want.
Cool the baked puffs completely.
Arrange them in a single layer on a tray and freeze until firm. Then transfer them to a freezer-safe container or bag.
Removing excess air helps reduce freezer burn.
Freezing After Coating
You can freeze coated puffs, but the cinnamon sugar may not be quite as crisp after thawing.
The butter can also cause the sugar layer to become patchy.
They’re still useful for make-ahead breakfasts.
They’re simply not going to taste exactly like a freshly dipped batch.
For the best result, freeze the plain baked puffs and coat them after reheating.
How to Reheat Breakfast Puffs Without Losing the Sugar Crunch
This is where many people accidentally ruin perfectly good breakfast pastries.
The microwave is fast.
It is also not your best friend if you want a crisp cinnamon-sugar exterior.
Oven Method
For the best overall texture, use a conventional oven.
Warm the puffs gently until heated through.
You don’t need to cook them again.
You’re simply refreshing the texture.
If they were frozen, thawing first can help them heat more evenly, although you can also warm them from frozen using a lower, gentler approach.
Keep an eye on them.
Small pastries don’t need much time.
Air Fryer Method
The air fryer is excellent for reheating small baked goods because circulating hot air can restore some surface crispness.
Use a moderate temperature and check frequently.
One minute can make a difference with tiny pastries.
If the puffs were already coated, avoid overheating them aggressively because the sugar can darken quickly.
What About the Microwave?
Use it when convenience matters more than crispness.
A short burst can warm a puff beautifully.
But you’ll probably get a softer exterior.
If you want both warmth and some crispness, microwave briefly and then finish the puff for a short time in a toaster oven or air fryer.
That two-step method is much closer to freshly baked.
Making Breakfast Puffs Ahead of Time
For entertaining, I recommend preparing the baked puffs ahead but saving the butter-and-sugar coating for closer to serving.
This gives you a little breathing room.
Bake the puffs.
Cool them.
Store them properly.
Then warm them gently before coating.
The final dip becomes a five-minute finishing step rather than something you have to coordinate while guests are walking through the kitchen.
A Simple Weekend Strategy
If you’re hosting brunch, here’s the approach I’d use:
- Bake the puffs earlier in the morning.
- Let them cool.
- Keep them covered appropriately.
- Prepare the cinnamon-sugar mixture.
- Melt the butter shortly before serving.
- Warm the puffs gently.
- Coat them while warm.
- Transfer them to a serving plate.
- Add fresh fruit and coffee.
That’s it.
No frantic last-minute baking marathon.
And nobody needs to know how easy they were.
That’s between us.
Common Breakfast Puffs Mistakes
Even easy recipes have traps.
Fortunately, most of them are avoidable.
Mistake 1: Overmixing
Problem: Dense, chewy texture.
Fix: Stir only until the dry ingredients disappear.
Mistake 2: Overfilling the Pan
Problem: The batter rises over the edges and produces uneven shapes.
Fix: Fill the mini muffin wells roughly two-thirds to three-quarters full.
Mistake 3: Too Much Butter in the Coating
Problem: Greasy bottoms and soggy sugar.
Fix: Dip lightly and let excess butter drip away.
Mistake 4: Coating Them While They’re Too Hot
Problem: Sugar melts and becomes patchy.
Fix: Let the puffs cool just enough that they’re warm rather than steaming.
Mistake 5: Storing Them While Warm
Problem: Condensation softens the coating.
Fix: Cool before sealing.
Mistake 6: Baking Until Dark Brown
Problem: Dry interior.
Fix: Look for a lightly golden exterior and a cooked center.
Frequently Asked Questions About Breakfast Puffs
What Is the Difference Between French Breakfast Puffs and Regular Muffins?
French breakfast puffs are essentially small, tender baked cakes or muffin-style pastries finished with melted butter and cinnamon sugar.
Regular muffins can be made in the same basic muffin-pan style, but they’re usually served without that buttery cinnamon-sugar coating.
The miniature size also changes the eating experience.
You get more surface area relative to the amount of cake, which means every bite can carry plenty of cinnamon sugar.
Why Are They Called French Breakfast Puffs If They Aren’t French?
The term French breakfast puffs is commonly associated with this particular style of cinnamon-sugar-coated baked treat, but the name shouldn’t be interpreted as proof that the recipe comes directly from traditional French pastry cuisine.
Names used in American home baking don’t always map neatly onto culinary history.
If you want an authentic French pastry, look toward established French baking traditions.
If you want a fluffy little cinnamon-sugar breakfast treat that takes minimal effort, make these.
Both can be excellent.
They just aren’t the same thing.
How Do You Reheat Breakfast Puffs Without Losing the Sugar Crunch?
Use an oven, toaster oven, or air fryer rather than relying entirely on the microwave.
Warm them gently until heated through.
For the best texture, freeze or store the baked puffs before applying the final cinnamon-sugar coating whenever possible.
If you already coated them, use moderate heat and watch closely so the sugar doesn’t burn.
Can I Make Breakfast Puffs Without a Mini Muffin Pan?
You can adapt the recipe to other small baking molds, but the size and shape will affect baking time.
A regular muffin tin will produce larger portions, which generally require longer baking.
Don’t assume the original timing still applies.
Instead, monitor the center and use a toothpick to check doneness.
The goal is a cooked, tender crumb—not a specific number on the timer.
Can I Make French Breakfast Puffs Gluten-Free?
Yes.
A quality 1:1 gluten-free baking flour blend is the simplest substitution.
Choose one designed for cup-for-cup baking, preferably one that already contains a suitable binder.
Because gluten-free flour blends vary, the batter may look somewhat different from a wheat-based version.
Avoid adding extra liquid immediately if the mixture looks thick.
Let the flour hydrate first, then decide whether an adjustment is actually needed.
Can I Make Them Dairy-Free?
Yes.
Use dairy-free baking butter or plant-based butter in place of regular butter and a dairy-free milk alternative in the batter.
The final flavor will depend heavily on the butter substitute, so choose one intended for baking rather than a very low-fat spread.
Why Did My Breakfast Puffs Turn Out Dense?
Usually, I’d investigate three things first: flour measurement, overmixing, and leavening.
Too much flour makes the batter heavy.
Overmixing develops excessive gluten.
Old baking powder may not provide enough lift.
Also check the oven temperature. If the oven isn’t reaching the expected temperature, the batter may spend too long heating before it sets.
Can I Add Fruit to Breakfast Puffs?
Absolutely.
Finely diced apples are especially good with cinnamon and nutmeg.
You can also experiment with small amounts of berries, although berries introduce additional moisture and can make the crumb softer.
Keep additions modest.
Remember, you’re working with miniature pastries.
A blueberry the size of a marble can feel enormous inside one of these little puffs.
Are Breakfast Puffs the Same as Doughnut Holes?
Not quite.
They may look similar, but traditional doughnut holes are generally made from dough and often fried, whereas breakfast puffs are made from a muffin-like batter and baked.
The finished texture is therefore more cake-like and tender.
The melted butter and cinnamon-sugar coating creates some of the indulgent character people associate with doughnuts.
That’s probably why the comparison is so tempting.
Can I Serve Breakfast Puffs for Brunch?
Absolutely.
They’re particularly good as part of a larger brunch spread because they’re small enough to snack on without dominating the plate.
Pair them with fruit, eggs, yogurt, coffee, or a savory breakfast dish.
If you’re serving a richer item such as million dollar bacon, the sweet cinnamon coating works especially well as a contrast.
Read : 7 Easy Bean Burrito Recipe Tips for Crispy, Tasty Meals
Final Thoughts
There’s something wonderfully uncomplicated about breakfast puffs.
They’re not trying to be a five-star pastry project. They don’t ask you to wake up at dawn and laminate dough while questioning every life decision that led you there.
They’re little baked treats.
Soft vanilla crumb. Warm nutmeg. Melted butter. Cinnamon sugar.
That’s the whole magic.
And because the recipe starts with a simple muffin-style batter, you can make it your own. Add orange zest. Try brown butter. Make a gluten-free batch. Swap in plant-based butter. Pull out the air fryer when the oven is busy.
The one thing I’d keep sacred?
Don’t overmix the batter.
And don’t skip that final cinnamon-sugar coating.
That’s where an ordinary mini muffin turns into the kind of breakfast bite that mysteriously disappears before everyone has even sat down.
Make a batch while they’re warm.
Pour yourself some coffee.
Then try to save a few for tomorrow.
I won’t promise you’ll succeed.
1 thought on “5 Easy Breakfast Puffs Secrets for the Best 2026 Bake!”