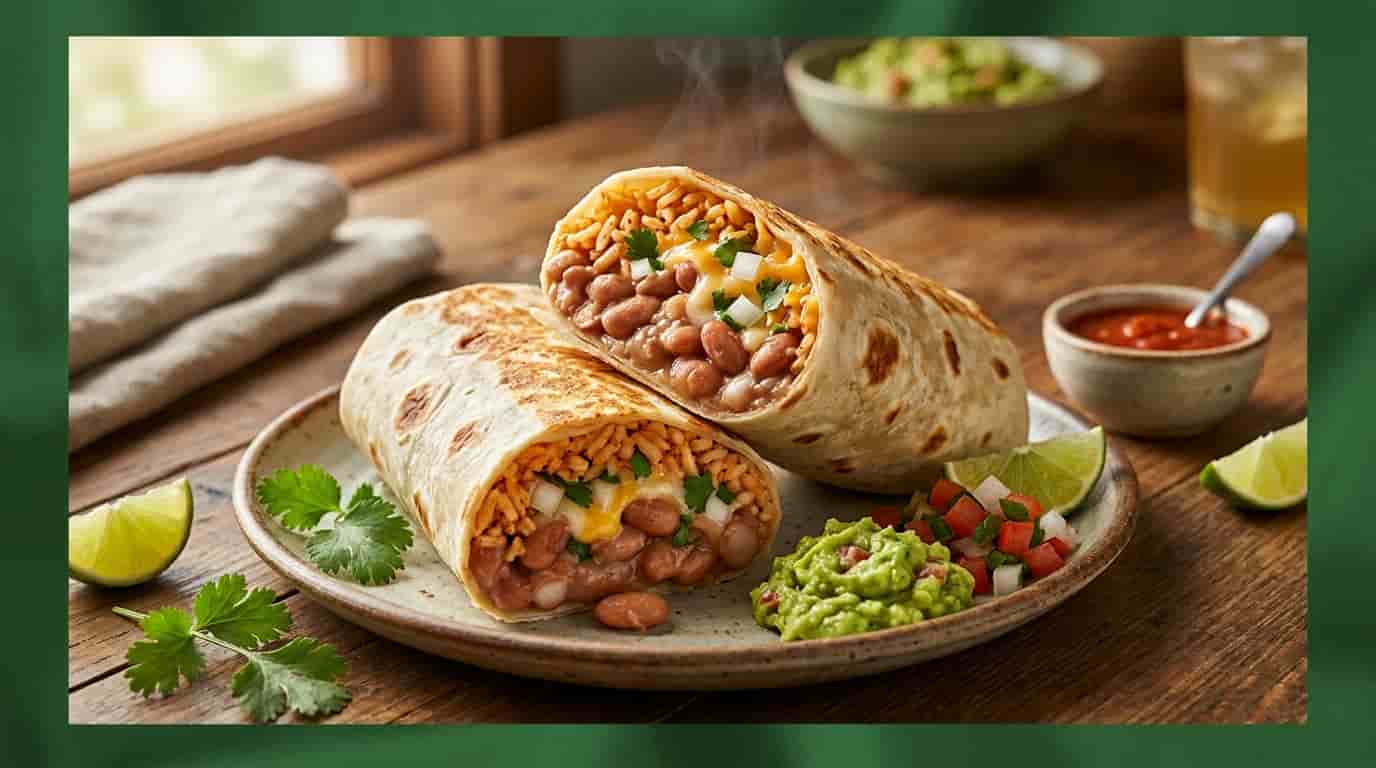
There’s a special kind of disappointment that comes from biting into a homemade burrito and getting… warm tortilla, bland beans, and a suspicious puddle of filling sliding out the other side.
I’ve been there.
That’s exactly why I developed this bean burrito recipe around three things that matter: bold flavor, a sturdy roll, and a crispy outside. You’ll get creamy seasoned beans, fluffy rice, gooey cheese, fresh toppings, and a golden skillet crust without turning your kitchen into a full-scale Mexican restaurant.
Even better? You can make these burritos in about 20 minutes, customize them easily, and freeze extras for another day.
So grab your tortillas. We’re making burritos.
Why You’ll Love This Easy Bean Burrito Recipe
Nutritious, Budget-Friendly, and Ready in 20 Minutes
Beans are doing a lot of heavy lifting here—and I mean that as a compliment.
They provide plant-based protein and dietary fiber, making them a particularly useful ingredient for filling vegetarian meals. USDA research also identifies dry edible beans as rich sources of both protein and fiber.
And you don’t need fancy ingredients.
A can of beans, some leftover rice, shredded cheese, tortillas, and a few pantry spices can turn into dinner surprisingly fast. That makes this bean burrito recipe ideal for busy weeknights, college kitchens, meal prep, or those evenings when ordering takeout sounds tempting but your bank account strongly disagrees.
Here’s another reason I love it: you can make every burrito slightly different.
Add corn. Toss in sautéed peppers. Use salsa instead of fresh tomatoes. Make the whole thing vegan. There are no burrito police.
The Secret to Restaurant-Style Flavor at Home
The trick isn’t dumping more cheese into the tortilla.
It’s seasoning the beans before they ever meet the tortilla.
Plain canned beans are perfectly fine, but they need help. A quick simmer with cumin, smoked paprika, garlic powder, chili powder, salt, and a splash of water transforms them from “straight out of the can” into something much richer.
I also like adding a squeeze of lime at the end. That little hit of acidity wakes everything up.
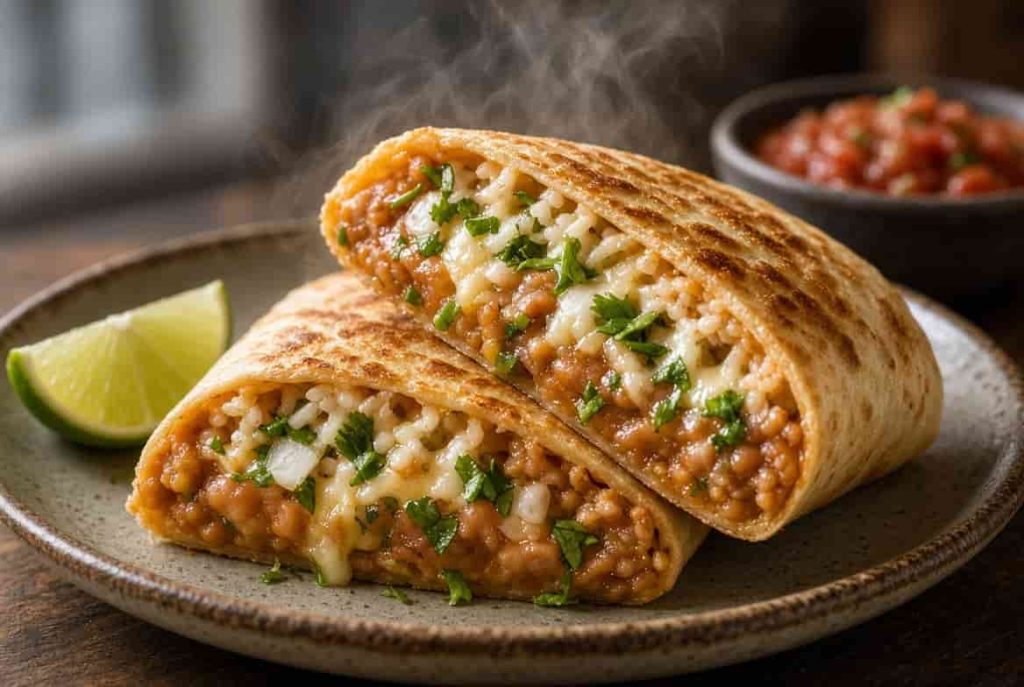
For the best texture, mash about two-thirds of the beans and leave the rest slightly chunky. You get a creamy base with enough texture to remind you that, yes, these are actually beans.
Essential Ingredients & Smart Substitutions
The Ultimate Bean Base: Pinto Beans vs. Black Beans
For the classic version, I prefer pinto beans.
They soften beautifully and mash into a creamy filling without becoming completely pasty. They also pair naturally with cumin, chili powder, cheese, rice, and fresh salsa.
But black beans deserve some love, too.
A black bean burrito has a slightly firmer texture and a deeper, earthier flavor. If you like more contrast in every bite, use black beans—or do what I sometimes do and mix both.
For four large burritos, gather:
- 2 cups canned pinto or black beans, drained
- 1 cup cooked rice
- 1 cup shredded Mexican-blend cheese
- 4 large flour tortillas
- ½ small yellow onion, finely diced
- 2 tablespoons chopped fresh cilantro
- 1 tablespoon olive or avocado oil
- 1 teaspoon ground cumin
- 1 teaspoon smoked paprika
- ½ teaspoon chili powder
- ½ teaspoon garlic powder
- ¼ teaspoon salt, plus more to taste
- 2–3 tablespoons water
- 1 tablespoon fresh lime juice
Want extra heat? Add cayenne or diced jalapeño.
Want more vegetables? Sauté bell peppers and onions before assembling.
Want a true veggie burrito? Add corn, roasted zucchini, mushrooms, or spinach.
Picking the Right Flour Tortillas & Shredded Mexican Blend Cheese
Use large, soft flour tortillas. Burrito-size tortillas are easier to fold because you need enough surface area to tuck the sides inward without squeezing the filling into submission.
Small tortillas can work, but they’re much less forgiving.
And don’t skip warming them.
Cold tortillas tend to crack when folded. Warm tortillas become softer and more flexible, which makes rolling dramatically easier.
For cheese, a Mexican blend is my first choice because it melts evenly and gives you a combination of creamy texture and mild savory flavor. Cheddar, Monterey Jack, Colby Jack, or pepper Jack can all work.
For a vegan vegetarian burrito, choose your favorite dairy-free shredded cheese—or leave the cheese out and add extra seasoned vegetables and avocado.
The Ultimate Taco Seasoning Blend
You don’t need a packet of taco seasoning.
For this filling, my basic combination is:
1 teaspoon cumin + 1 teaspoon smoked paprika + ½ teaspoon chili powder + ½ teaspoon garlic powder + ¼ teaspoon salt.
Cumin brings that warm, earthy backbone. Smoked paprika adds depth and a subtle smoky note. Chili powder supplies the familiar taco-style warmth without overpowering the beans.
Taste the filling before assembling.
This sounds obvious. Yet it’s the step people skip most often.
If the beans taste bland in the pan, the finished burrito will taste bland too.
Step-by-Step Instructions: How to Make the Best Bean Burritos
Step 1: Simmer the Refried Beans & Spice Blend
Heat the oil in a skillet over medium heat.
Add the diced onion and cook for about 2 minutes, just until it begins to soften. Add the drained beans, cumin, smoked paprika, chili powder, garlic powder, salt, and water.
Now mash roughly two-thirds of the beans with the back of a spoon or potato masher.
Keep some whole.
That’s important.
Cook for 3–5 minutes, stirring occasionally, until the mixture is hot, thick, and spreadable. Finish with lime juice and taste for seasoning.
The consistency should resemble thick mashed potatoes.
If the beans look watery, keep cooking for another minute or two. If they seem dry, add another splash of water.
Step 2: Warm Tortillas So They Never Tear
This part takes less than a minute, but it can save the entire burrito.
Warm each tortilla in a dry skillet for about 10–15 seconds per side, just until soft and flexible. You can also microwave them briefly under a slightly damp paper towel.
Don’t overheat them.
You’re trying to make them pliable—not turn them into crackers.
Step 3: Layer to Prevent a Soggy Burrito
Place a warm tortilla flat on your work surface.
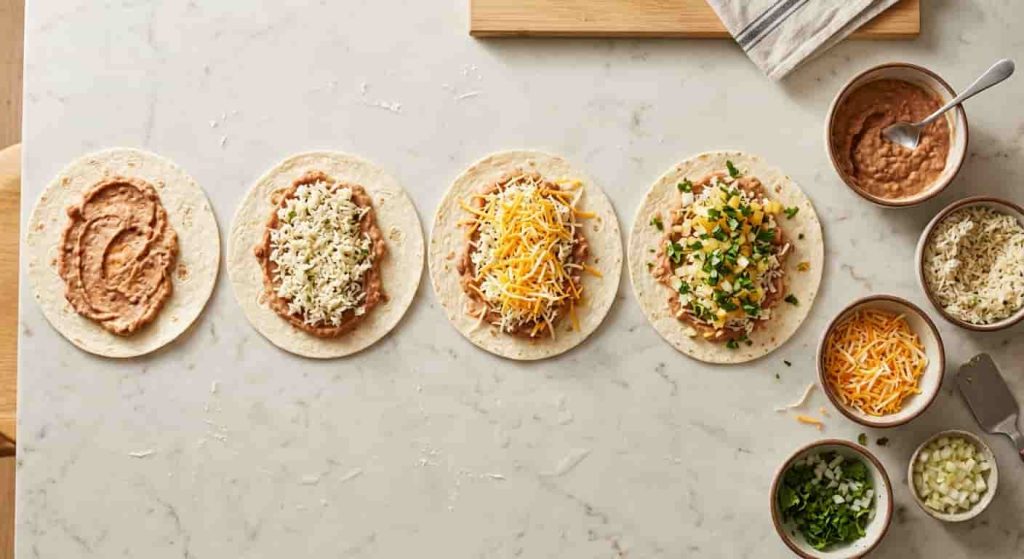
Spread about ½ cup of seasoned beans slightly below the center. Leave plenty of empty space around the edges.
Add approximately ¼ cup cooked rice, followed by cheese, diced onion, and cilantro.
Here’s the important part: don’t overload it.
I know. More filling sounds better.
It isn’t.
An overstuffed burrito is harder to roll, more likely to split, and much more likely to become soggy once sauces enter the picture. Keep wet ingredients such as salsa or sour cream for serving rather than flooding the inside.
How to Roll a Burrito Like a Pro
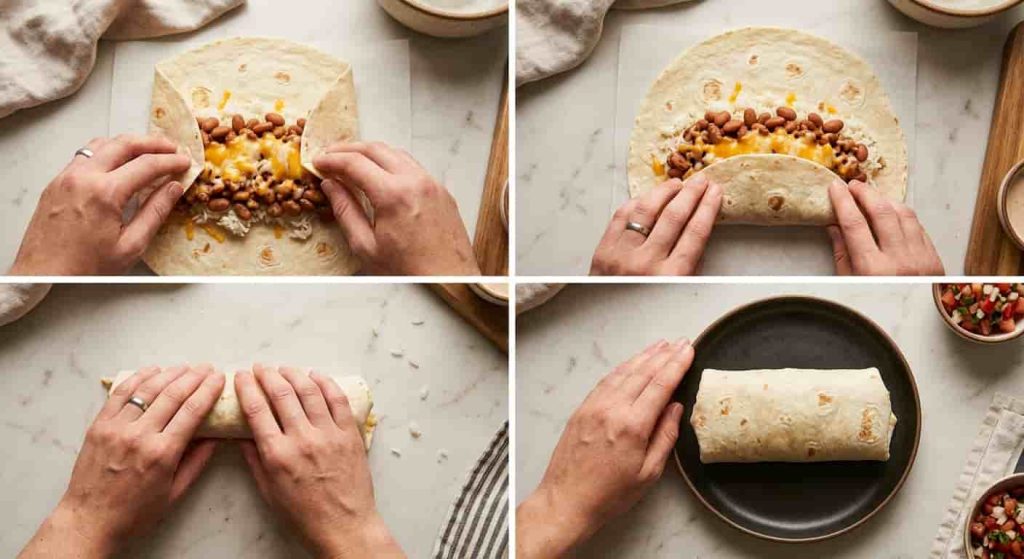
The Tuck-and-Roll Technique
This sounds technical.
It isn’t.
Think of it as closing an envelope that happens to contain dinner.
First, fold the left and right sides inward toward the filling. Next, lift the bottom edge of the tortilla over the filling and tuck it firmly underneath. Then roll the burrito forward, keeping gentle pressure as you go.
The goal is snug, not strangled.
If filling starts escaping from the sides, you’ve probably used too much. Remove a little rather than forcing the tortilla to cooperate.
Once rolled, place the burrito seam-side down.
That simple move helps keep it closed while you crisp it.
Cooking & Crisping Methods for Maximum Texture
A good burrito is delicious.
A crispy burrito is memorable.
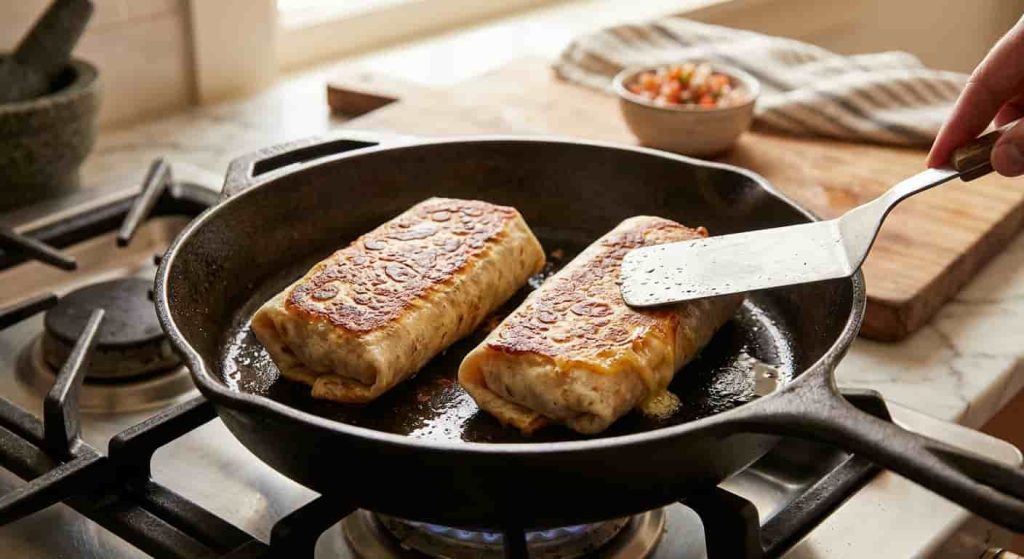
Once your burritos are rolled seam-side down, you have three solid options. I usually reach for the skillet because it gives the tortilla that golden, lightly blistered crust that makes the whole thing taste restaurant-worthy.
Option 1: Skillet Pan-Seared for a Crispy Crust
Heat a lightly oiled skillet over medium heat.
Place each burrito seam-side down and cook for about 2–3 minutes, pressing gently with a spatula. Once the bottom turns golden brown, rotate it and crisp the remaining sides.
Don’t crank the heat to high.
That tends to brown the tortilla before the center has warmed properly. Medium heat gives the cheese time to melt while the tortilla develops that satisfying crunch.
For an especially crisp bean burrito, use just enough oil to coat the pan. Too much turns the tortilla greasy rather than crisp.
Option 2: Air Fryer Method for Fast Crunch
The air fryer is fantastic when you want crispiness without standing over a skillet.
Lightly brush the outside of the burritos with oil, then place them seam-side down in the basket. Air fry at approximately 375°F for 6–9 minutes, turning halfway through.
Keep an eye on them near the end.
Air fryers vary, and tortillas can go from beautifully crisp to overly dark surprisingly quickly.
Option 3: Oven-Baked in Foil for Feeding a Crowd
Making dinner for several people?
The oven wins.
Wrap the burritos individually in foil and place them seam-side down on a baking sheet. Bake at 375°F until heated through, generally around 15–20 minutes depending on how cold the filling was.
Want crispy edges? Open the foil during the final few minutes and let the tortillas brown lightly.
This method won’t create quite the same skillet crust, but it’s wonderfully convenient when you’re cooking a whole batch of vegetarian burritos at once.
Meal Prep & Storage: Freezer-Friendly Instructions
Wrapping in Parchment Paper & Tightly Sealed Foil Wrap
These burritos were practically made for meal prep.
The key is cooling the filling before assembling your freezer batch. Hot filling creates excess condensation, and condensation is the enemy of a crisp tortilla.
Once assembled, let the burritos cool completely before wrapping.
Wrap each one tightly in parchment paper, then add a layer of foil or place the wrapped burritos in a freezer-safe bag with as much excess air removed as practical.
Label the package with the date.
USDA guidance says frozen food kept continuously at 0°F is safe indefinitely, while recommended freezer times are mainly about maintaining quality. For cooked leftovers specifically, USDA recommends using refrigerated leftovers within 3–4 days and freezing them for longer storage.
For the best texture, I’d aim to enjoy these burritos within a few months rather than treating them like freezer archaeology.
How to Reheat Frozen Burritos
There are three easy approaches.
Microwave: Remove the foil. Wrap the burrito in a slightly damp paper towel and microwave until hot in the center, flipping once or twice. Then transfer it to a skillet or air fryer for a few minutes if you want the tortilla crisp.
Oven: Keep the burrito wrapped in foil and bake at about 350°F until heated through. Open the foil near the end if you want a crisp exterior.
Air fryer: For the best combination of convenience and crunch, place the frozen burrito in the air fryer and cook until thoroughly heated and crisp, turning once as needed.
For food safety, USDA recommends reheating leftovers to 165°F throughout.
A Small Freezer Trick That Makes a Big Difference
Don’t freeze wet toppings inside the burrito.
Salsa, tomatoes, sour cream, and guacamole contain enough moisture to make the tortilla softer after thawing. Add those after reheating instead.
It sounds like a tiny detail.
It isn’t.
That little bit of restraint is what keeps your future burrito from tasting like a thawed envelope.
Delicious Serving Suggestions & Dip Pairings
Keep the Toppings Fresh
The warm burrito is only half the experience.
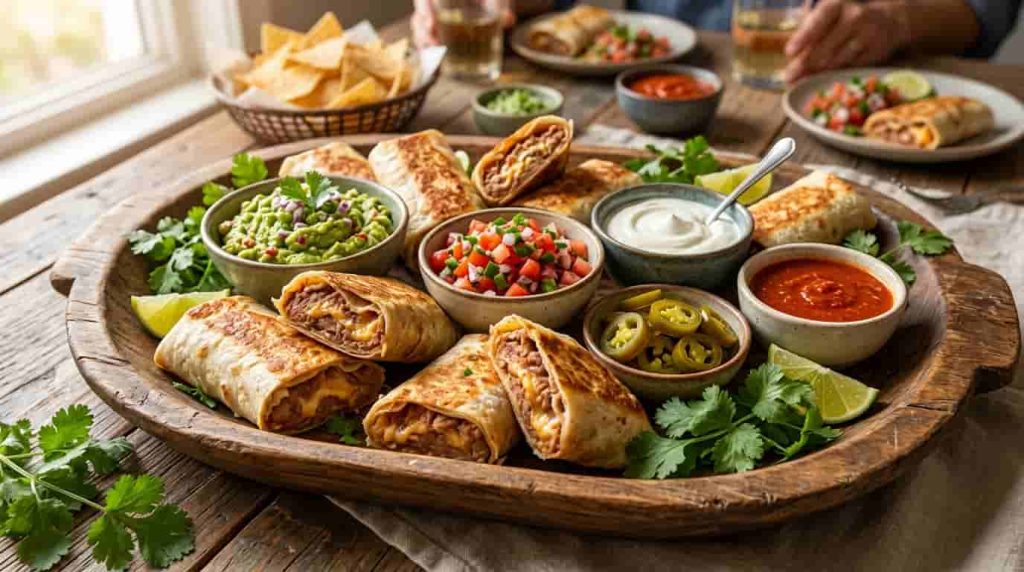
I love serving mine with a simple spread of:
- Fresh pico de gallo
- Creamy guacamole
- Sour cream or plain Greek yogurt
- Pickled jalapeños
- Fresh cilantro
- Lime wedges
- Your favorite hot sauce
Turn It Into a Full Mexican-Inspired Dinner
Pair your burrito with Mexican-style corn, a simple green salad, tortilla chips and salsa, or a bowl of fresh fruit.
For extra protein, add grilled chicken or a fried egg on the side.
For a fully plant-based meal, skip dairy cheese and sour cream and add avocado, roasted vegetables, or a spoonful of seasoned corn and black beans.
That’s one of my favorite things about this recipe: the basic bean filling stays affordable, while the toppings can take it in completely different directions.
Read More Article: 75+ Dairy Free Dinner Recipes Everyone Will Love (Easy, Quick & Family-Friendly)
Frequently Asked Questions
How do you keep bean burritos from getting soggy?
The biggest trick is controlling moisture.
Use thick, well-seasoned beans rather than watery beans. Don’t pour salsa or sour cream directly into the tortilla. Keep juicy vegetables modest, and let cooked ingredients cool slightly before freezing.
Warming the tortilla before rolling also helps because you’re less likely to tear it and accidentally create openings where moisture can escape into the tortilla.
For the crispiest result, pan-sear the finished burrito seam-side down.
What is the best way to reheat a frozen bean burrito?
For convenience, the microwave is fastest.
For texture, I prefer the air fryer because it warms the center while restoring some crunch to the tortilla. An oven works especially well when you’re reheating several burritos together.
Whichever method you choose, make sure the center reaches 165°F before eating.
If the outside becomes brown before the filling is hot, reduce the cooking temperature and give the burrito more time.
Can I make this bean burrito recipe vegan?
Absolutely.
Replace the regular cheese with your favorite dairy-free shredded cheese or leave it out. Skip sour cream and use guacamole, avocado, salsa, or a dairy-free creamy sauce instead.
The seasoned bean base itself is easy to keep plant-based.
Black beans also work beautifully here, so you can turn the recipe into a hearty black bean burrito without changing the basic cooking method.
One Last Bite
The best homemade burritos don’t need a complicated ingredient list.
They need balance.
Creamy beans. A little spice. Melty cheese. Soft rice. Fresh toppings. And, ideally, a tortilla with just enough golden crunch to make you pause after the first bite.
That’s why this bean burrito recipe has earned a regular spot in my weeknight rotation.
It’s inexpensive. It’s flexible. It freezes well. And unlike some “quick” meals, it doesn’t feel like a compromise.
Make them for dinner tonight, freeze a few for later, and keep the toppings fresh until you’re ready to eat.
Your future self will appreciate the burrito.
Very much.
1 thought on “7 Easy Bean Burrito Recipe Tips for Crispy, Tasty Meals”